Last updated November 18, 2026





Free written scope consultation - allowances, timeline, and change-order rules on paper before a single trade is scheduled
Bathroom Remodeling Warning Signs Every Homeowner Should Know
The number one cause of post-remodel mold claims isn’t bad tile work – it’s a waterproofing membrane that looked fine on inspection day but was applied 30% too thin. That thin coat passes the eye test and fails the moisture test, and by the time you notice the smell, the framing behind it is already compromised. Most bathroom remodeling problems don’t announce themselves during the build. They surface 12 to 24 months later, when a failed shower pan shows up as a soft spot near the threshold or a stained ceiling in the room below. What follows is the full warning-sign playbook we use ourselves on Westchester jobs – what to catch during construction, what to catch in the first 90 days, and the exact questions to ask before you sign off on final payment.
Quick Answer
The biggest warning signs of a bad bathroom remodel are visible during the work, not after: missing waterproofing membrane on the shower walls, seams in cement board that aren’t taped and mudded, tile lippage above tolerance, and a shower niche with no weep holes. After completion, watch for grout cracking along movement joints within 90 days, persistent humidity after the exhaust fan runs ten minutes, and inconsistent hot water pressure that points to a valve that wasn’t properly balanced. If you can catch these early, most bathrooms are fixable. If you wait a year, you’re paying for a second remodel.
Styles & brands we work with
- Kitchen remodeling
- Bathroom remodeling
- Home additions & ADU
- Roofing
- Windows & doors
- Driveway & pavers
- Fence
Table of Contents
- Warning Signs During Construction
- Red Flags in the First 90 Days
- The 30-Day Post-Remodel Walkthrough
- Questions to Ask Before Final Payment
- Documentation You Should Have in Hand
- Westchester-Specific Warning Signs
- Contractor Red Flags Before You Hire
- Common Mistakes to Avoid
Warning Signs During Construction
The most expensive bathroom remodeling mistakes happen behind the walls and under the floor, in the stage of the job most homeowners never actually inspect. A builder can be honest, organized, and responsive on the phone – none of that tells you whether the waterproofing was rolled on at the manufacturer’s required thickness. We’ve walked into Westchester bathrooms after another contractor’s “finished” job and found cement board buried under three coats of RedGard so thick it cracked. We’ve also found the opposite: a membrane skimmed on at half the specified wet thickness, because the crew was trying to finish in one coat instead of two. Both fail. In our experience, about one in three failed showers we get called to inspect comes down to a waterproofing issue, not a tile issue.
Here’s what to look for while the work is open:
- Cement board gaps. Panels should sit 1/8″ apart with seams taped and mudded in thinset. If you can slide a credit card into a vertical seam and see exposed foam or framing behind it, water will too.
- No visible waterproofing on shower walls. If the crew is setting tile directly on bare cement board with no membrane, that’s a redo. Ask to see the product data sheet and confirm the wet thickness and coat count before the tile goes up.
- Missing weep holes in the shower pan or niche. Weep holes at the drain flange let water escape the mortar bed. Blocked weep holes mean the pan stays wet permanently, which is the fastest route to a hidden mold colony.
- Tile lippage over 1/16″. Run a straightedge across adjacent tiles. A lip you can feel with your fingertip is over the ANSI tolerance for large-format tile and will collect water, dirt, and eventually grout cracks.
- No flood test on the pan. The pan should hold water for at least 24 hours before tile goes down. If you don’t see the test, ask why.
- Framing that moves. Push against the tub surround. If there’s flex, the subfloor or wall framing needs sistered studs or blocking before tile goes back on.
If a contractor won’t let you look behind the wall at the waterproofing stage, that’s the single best reason to walk the job. A pro in Westchester will happily let you take photos at this point – it protects everyone.
Red Flags in the First 90 Days
The first three months after a bathroom remodel are the most diagnostic window you’ll get. Most genuine workmanship failures show up within that period, which is one reason a written workmanship guarantee matters far more than a verbal promise at handshake time. A 730-Day Done Right Promise backs the labor for two full years – long enough to cover the seasonal shifts in a Westchester climate where a humid July and a 40-degree January swing through the same bathroom wall over and over.
These are the post-completion warning signs we tell every homeowner to watch for:
- Grout cracking along movement joints. Grout cracks in the field of tile (mid-tile) are normal shrinking. Grout cracking in a straight line where the wall meets the floor, or at inside corners, means the joint was grouted instead of caulked with a flexible sealant. That’s a workmanship error and it will keep happening until it’s corrected.
- Persistent humidity after the fan runs ten minutes. Run the exhaust fan for ten minutes with the door closed. If the mirror still fogs 20 seconds after you walk back in, the fan is either undersized (should move 1 cfm per square foot of bathroom) or it’s ducted into the attic instead of outside. Both are common in Westchester retrofits.
- Inconsistent hot water pressure between fixtures. If the shower runs hot but the sink runs cold, or pressure drops when a second fixture runs, the pressure-balancing valve was never adjusted. You shouldn’t have to tune the temperature every time you shower.
- Water pooling at the shower threshold. A shower pan should slope to the drain at roughly 1/4″ per foot. If you’re squeegeeing after every shower, the pitch is wrong and the waterproofing is doing all the work – which it won’t for long.
- Soft spots in the floor near the toilet or shower. A spongy area underfoot means the subfloor wasn’t properly bedded or the toilet flange is leaking. Both are fixable early and both are catastrophic in year three.
- Tile separating from the wall (hollow sound). Tap each wall tile with a plastic screwdriver handle. A hollow ring instead of a dull thud means the thinset didn’t bond. A few tiles do this occasionally; a whole wall doing it means the substrate was prepped wrong.
The 30-Day Post-Remodel Walkthrough
Thirty days after the final walkthrough is the right time for a full, methodical pass through the bathroom – early enough to catch workmanship issues inside a typical warranty window, late enough that any water intrusion has had time to surface. You don’t need any contractor knowledge to do this. You need a flashlight, a phone camera, a roll of painter’s tape, and about 45 minutes.
Follow this sequence room-by-room:
- Flashlight sweep the ceiling and walls. Look for water stains, bubbling paint, and discolored caulk lines. Mark any suspect area with painter’s tape and photograph it.
- Run every fixture for two full minutes. Hot and cold. Shower, tub, both sink taps, toilet fill. Note any change in pressure or temperature drift.
- Fill the tub and shower pan. Let the water sit 20 minutes, then drain. Watch the drain rate – slow drains suggest a partial clog or improper slope.
- Tap every tile on the shower wall and floor. Note hollow spots as you go. Anything that sounds more hollow than the tile next to it gets photographed and documented.
- Run the exhaust fan for 15 minutes with the door closed. Then hold a piece of toilet paper up to the grille. If it doesn’t stick to the grille, the fan isn’t pulling air.
- Open the vanity cabinet and look under the sink. Run both taps hot for 60 seconds. Look for any drips at the P-trap, supply lines, and shutoff valves.
- Push against the shower walls and grab bars. Anything that flexes more than a hair means missing blocking behind the wall.
- Check the door swing, floor transition, and paint. Cosmetic punch-list stuff – easier to get fixed in one visit than in five separate calls.
Photograph everything that doesn’t look right, send it to your contractor with a written list, and save the list. If a fix is coming, you want a record. If a fix isn’t coming, you want a record of that too.
Questions to Ask Before Final Payment
Final payment is the last leverage you have. Once you write that check, you’re relying on the contractor’s follow-through and the strength of the written warranty. Most homeowners sign off because the room looks finished – which is not the same thing as the job being finished. These are the specific questions that separate a real close-out from a cosmetic one, and they’re the questions we expect to answer on every Westchester project we finish.
- “Are all permits closed and inspected?” Open permits follow the house, not the contractor, and they show up when you sell. Ask for the signed-off inspection card or the municipality’s final inspection confirmation.
- “Do you have photos of the waterproofing before tile went up?” Every pro takes these. If the answer is no, you don’t have evidence that the waterproofing was done right – and no warranty covers an issue you can’t prove.
- “Are the product warranties registered, and in my name?” Kohler, Moen, and most tile and fixture manufacturers require registration within a set window. If they were never registered, that warranty is effectively void.
- “What’s the written workmanship warranty, and does it cover labor, materials, or both?” A one-year labor warranty is a common baseline. A 730-Day Done Right Promise covers two full years of labor – which is the window most failures actually hit.
- “Is the final invoice the same as the bid?” If the number moved, ask for a written change order for every line. Upfront pricing means the number you saw is the number you pay. Anything else is a red flag.
- “Will you do a 30-day check-in, or do I call you if something fails?” A pro will offer the check-in. A contractor who’s already mentally on the next job won’t.
- “Can I get the as-built documentation?” That’s a simple packet: permit number, inspection sign-offs, waterproofing photos, product data sheets and receipts, warranty registrations, and a punch-list close-out.
If a contractor pushes back on any of these questions, that itself is the answer. A real close-out is a 15-minute conversation, not a negotiation.
Documentation You Should Have in Hand
By the time a bathroom remodel is done in Westchester, you should have a small folder of documents – not a shoebox of receipts, a properly organized close-out packet. What you have in hand at the end of the job is what protects you in year two, year five, and year ten. In our experience, missing documentation is the number one reason a homeowner loses a warranty claim that should have been approved.
Here’s exactly what you should walk away with:
- Closed permit and final inspection record. A signed inspection card from your municipality or county. For Westchester projects, this comes from the local building department and confirms the rough framing, plumbing, and final inspection were all seen and approved by an inspector – not just the contractor.
- Waterproofing inspection photos. Dated images of every shower wall and pan before tile went on. This is the single document that proves the membrane was installed, what brand and product was used, and that the seams were properly taped.
- Product data sheets and receipts. The exact thinset, membrane, and sealant used, plus the membrane manufacturer’s warranty card. These matter because membrane warranties are specific to product and use – a generic “waterproofing” claim won’t cover a specific system.
- Registered product warranties. Fixture warranties (Kohler, Moen, Delta, and others), tile warranties, and vanity or cabinet warranties. Registered in your name, delivered digitally or by mail.
- The written workmanship warranty. Not a handshake – a written document that spells out the coverage period, what’s covered, and the process for filing a claim. A 730-Day Done Right Promise in writing is a real asset. A verbal “we stand behind our work” is not.
- A close-out punch list, signed by both parties. The last remaining items and their completion status. Anything still open gets a date.
- As-built photos of plumbing and electrical. Where the shutoffs are, where the valve bodies sit inside the wall, and where wiring runs. If you ever open that wall again, these photos save hours of guessing.
If any of these are missing when the job wraps, ask. If the contractor can’t produce them, that’s information you can use before you sign off on final payment – not after.
Westchester-Specific Warning Signs
A bathroom in Westchester lives through a wider range of temperatures and humidity than the national average, and that matters. The same shower that holds up fine in a dry climate can fail here if the vapor barrier and exhaust are wrong. Summer humidity in Westchester routinely sits above 80% for weeks, and winter interior humidity swings below 30% when the heat runs. That cycle expands and contracts tile, grout, and caulk joints on a seasonal rhythm. If your contractor built your bathroom like it was going into a showroom in Phoenix, you’ll see the consequences by the second summer.
These are the warning signs that show up on Westchester jobs more than most:
- Mold in the exterior-wall corner. Westchester has a lot of older housing stock where the exterior wall wasn’t properly insulated before the shower went in. Warm interior air hits cold exterior framing and condenses inside the wall cavity. You’ll see it as a stain on the ceiling below the bathroom or a persistent musty smell that doesn’t go away with the fan.
- Cracked grout along the full height of a grout line. Seasonal movement. It’s grout cracking in a straight line from floor to ceiling, at a corner or where cement board meets drywall. Flexible sealant belongs at these joints – grout doesn’t.
- Peeling paint on the ceiling directly above the shower. Usually means the exhaust fan is ducted to the attic vent instead of terminating outside the roof. In a Westchester attic, that moisture comes back through the ceiling within a year.
- Hollow sound on the exterior shower wall only. Often a sign that substrate panels weren’t properly screwed off to a true stud line. Seasonal shifting pops the thinset bond on that wall first.
- Visible efflorescence on floor tile edges. White chalky deposits at the base of tile are usually moisture migrating up through an improperly sealed pan – common in Westchester when slab-on-grade bathrooms were retrofitted without checking the vapor barrier under the slab.
None of these need a contractor’s expertise to spot. They need you to look at the right places at the right time.
Contractor Red Flags Before You Hire
The signs that show up after the job starts are expensive. The signs that show up before the job starts are free. We’ve walked into Westchester homes where the previous contractor wrote a bid on a napkin, never pulled a permit, and disappeared six weeks into a bathroom that’s now half-demolished. Knowing what a right contractor looks like saves you from ever meeting a wrong one.
Here’s the checklist we’d want every homeowner to run before signing:
- Vague or verbal-only bids. A real bathroom bid is line-item and in writing: demo, rough-in, waterproofing, tile, fixtures, electrical, paint. If the bid says “bathroom remodel – $X,” that’s not a bid, it’s a range.
- No permitting conversation. In Westchester, most bathroom remodels that touch plumbing or electrical require a permit. A contractor who suggests skipping the permit is suggesting you own the risk and the code violation.
- Pressure to sign today. “This quote is only good for 48 hours” is a sales tactic. Material pricing fluctuates, and no honest contractor prices a bathroom on an expiring clock.
- No physical insurance or license documentation on request. A legitimate contractor will text or email proof of insurance and licensure within minutes. If they get defensive, that’s the answer.
- Large deposit demand. A 50% deposit up front is a common red flag. A reasonable deposit covers material ordering, not the contractor’s cash flow for the whole job.
- No named crew, no uniform, no background check. Background-checked, uniformed technicians on every job tell you the contractor has a hiring standard. An unmarked van with a rotating cast of subs is a warranty risk waiting to happen.
- No written workmanship warranty. “We stand behind our work” isn’t a warranty. A 730-Day Done Right Promise in writing is.
If a contractor makes it through all seven of those, and you still feel uneasy, ask for two recent Westchester references from bathrooms in the same age range as yours. Tile set on a 1950s house behaves differently than tile on a 2015 one.
Common Mistakes to Avoid
- Skipping the pre-tile inspection. Once the tile goes up, the waterproofing behind it is invisible. Walk the job at the waterproofing stage, take photos, and don’t let the tile crew start until you’re satisfied.
- Treating the exhaust fan as optional. An undersized fan in a Westchester bathroom is a hidden mold factory. Confirm the CFM matches the square footage and that the duct terminates outside the roof, not in the attic.
- Grouting the movement joints. Flexible joints at inside corners and where the wall meets the floor need sealant, not grout. Grout cracks here every single time, and the crack is the entry point for water.
- Accepting a lump-sum bid. Without a line-item breakdown, you have no way to know what’s included, what’s excluded, and what “upfront pricing” actually means. Get the numbers in writing before you sign.
- Not registering the product warranties. Most fixture and tile warranties require registration within a specific window. If you miss it, the manufacturer can deny a claim in year two.
- Skipping the permit to save a few hundred dollars. An unpermitted bathroom in Westchester can trigger a re-inspection and disclosure headache when you sell the house – and it voids most insurance claims tied to the plumbing work.
- Waiting past 90 days to report failures. A grout crack, a soft spot, or a hollow tile reported at day 45 gets treated as a workmanship issue. Reported at day 400, it’s often treated as wear and tear.
When to Call a Professional
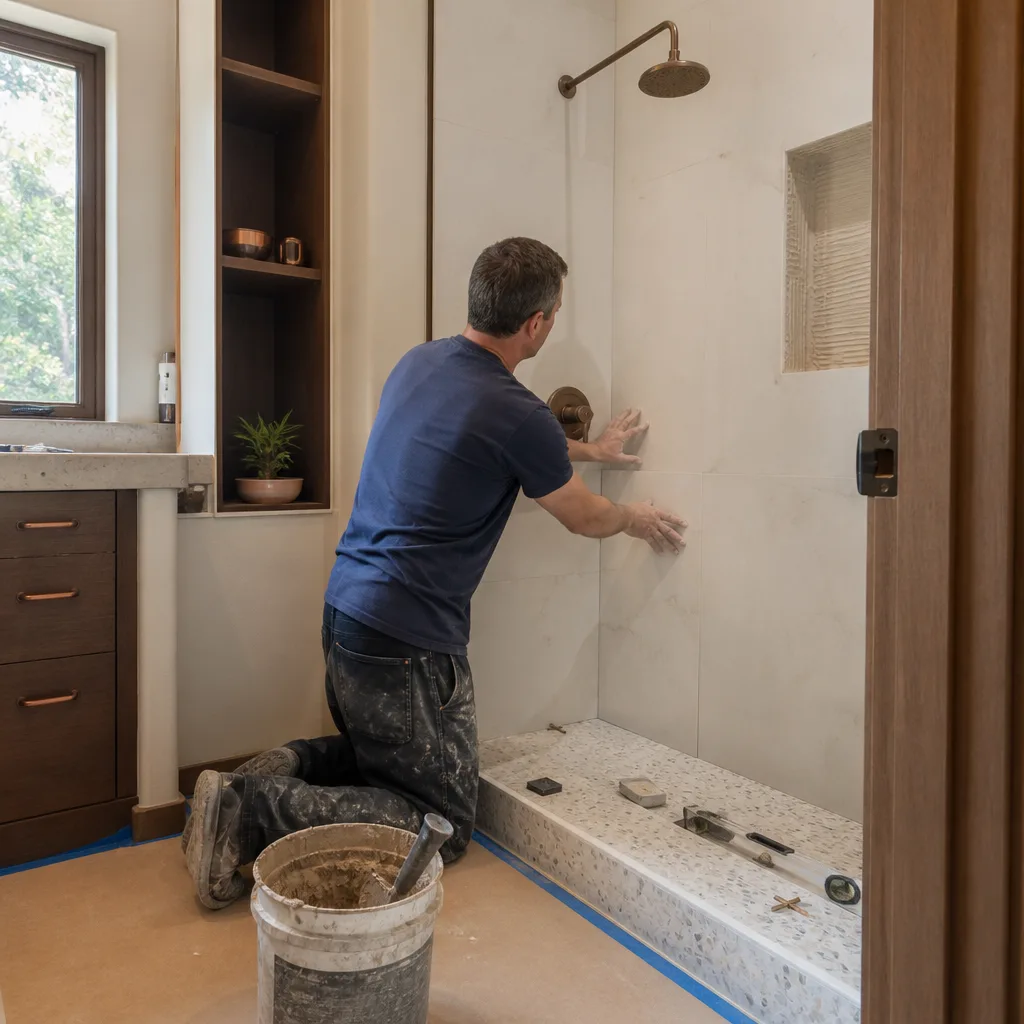
Some things are worth fixing yourself. A cracked caulk line at the tub edge is a $12 tube of silicone. A running toilet is usually a flapper. But most of the warning signs in this guide are not DIY territory. A shower pan with a hidden leak, an improperly installed waterproofing membrane, a pressure-balancing valve that wasn’t adjusted, a subfloor that’s soft under the toilet – these all sit behind finished surfaces, and pulling them back requires skill, drying equipment, and the right substrate replacement. More importantly, if the original work is within a warranty period, opening it up yourself can void the very coverage that should be paying for the fix. Call the original contractor first, document everything in writing, and if their response is slow or evasive, get a second opinion from a professional who can scope the actual damage.
Groundwork Construction Co. of Westchester offers free estimates in Westchester – call (833) 630-4214. We’ll walk the room, document what we find, and hand you a written scope before anything is opened up.
See the difference
 Before
 After
 Before
 After
 Before
 After
Frequently Asked Questions
Most workmanship problems surface within the first 12 to 18 months. Grout cracking at movement joints usually appears by 6 months, exhaust and humidity issues by the first full summer, and hidden waterproofing failures typically show up between 12 and 24 months when the subfloor or framing behind the shower has had a full wet-dry cycle. That’s why a 730-Day Done Right Promise matters more than a one-year verbal “we stand behind it” guarantee.
Fixing a failed shower pan typically runs $3,500 to $8,000 in Westchester, depending on how much rot has developed by the time it’s caught. A waterproofing redo on a shower wall without structural damage is usually $2,000 to $4,500. If you’re looking at framing replacement and mold remediation, that can push past $12,000. Call (833) 630-4214 for an exact scope and written estimate – estimates are free.
You need three things: photos of the waterproofing membrane before tile went up, the product data sheet confirming the membrane was applied at the manufacturer’s specified wet thickness, and confirmation the shower pan was flood-tested for 24 hours. If any of those three is missing from your close-out packet, the waterproofing is unverified, no matter how good the tile looks.
Grout cracking mid-tile is normal for the first 60 to 90 days as the tile and thinset cure. Grout cracking in a straight line at inside corners, where the wall meets the floor, or at the shower seat is not normal – that means the joint should have been caulked with flexible sealant instead of grouted. Call (833) 630-4214 if you’re seeing cracks in those specific locations within the first 90 days.
Yes, any bathroom remodel in Westchester that touches plumbing, electrical, or structural framing requires a permit and inspections. That includes replacing a shower valve, moving a drain, adding a new circuit, or relocating a wall. A contractor who suggests skipping the permit is asking you to carry the code violation, the disclosure issue at resale, and the insurance risk on their behalf.
Ask these five questions in writing: Are all permits closed and inspected? Do you have photos of the waterproofing before tile went up? Are the product warranties registered in my name? What is the written workmanship warranty and what does it cover? Is the final invoice the same as the bid? A contractor with nothing to hide answers all five without hesitation.
The Bottom Line
The warning signs of a bad bathroom remodel are almost never on the surface – they’re behind the waterproofing membrane, at the untaped cement board seam, at the movement joint that was grouted instead of caulked, and at the exhaust fan ducted into the attic. Catch them during the build and most bathrooms are fixable; catch them at year two and you’re paying for a second remodel. Walk the job at the waterproofing stage, photograph everything, run the 30-day walkthrough, and don’t sign the final check without the close-out documents in hand. The right contractor will hand them over without being asked – a written 730-Day Done Right Promise and a real close-out packet are how you know you hired the right one.
Related Guides
If you’re planning a larger project, our team puts together similar guides for the rest of the home. Start with an overview of Groundwork Construction Co. of Westchester home services, explore exterior work like Driveway & Pavers in Westchester, look at curb appeal with Fence Installation in Westchester, or plan a bigger footprint with Home Additions & ADU in Westchester.
Get a Free Bathroom Remodel Estimate in Westchester

If you’re staring at a bathroom that’s throwing warning signs – a grout crack that’s growing, a soft spot near the toilet, a shower that stays foggy ten minutes after the fan runs – call us. Our technicians have up to 12 years of experience, they arrive background-checked and uniformed, and every job is backed by the 730-Day Done Right Promise in writing. Live person answers the phone 24/7. Free project estimate and design consult, upfront pricing with no surprise change orders, 0% financing for 18 months, and $1,000 off projects over $10,000. Call (833) 630-4214 to schedule your free estimate.
Written by the team at Groundwork Construction Co. of Westchester.